Import/Export
Use this screen to create import and export templates. The import/export template management screen is available in the Import/Export module of the Administration group.

Import/Export Template Management Screen
Manage Import/Export Templates
To create a new template:
- Click on the Add Template button in the left sidebar.
- Fill in the required fields in all steps.
- Click on the Finish button.
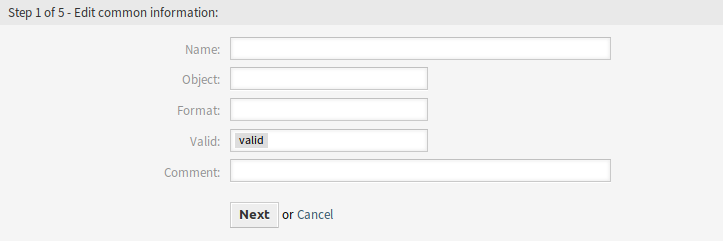
Create New Import/Export Template Screen
To edit a template:
- Click on a template in the list of templates.
- Modify the fields in all steps.
- Click on the Finish button.
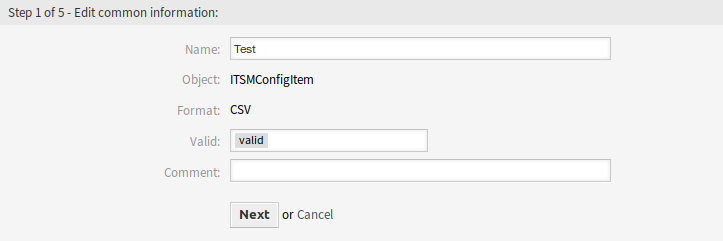
Edit Import/Export Template Screen
To delete a template:
- Click on the trash icon in the list of templates.
- Click on the Confirm button.

Delete Import/Export Template Screen
To import data based on a template:
- Click on the Import link in the list of templates.
- Click on the Browse… button and select a CSV file.
- Click on the Start Import button.

Import Data Screen
To export data based on a template:
- Click on the Export link in the list of templates.
- Choose a location in your computer to save the
Export.csvfile.
Import/Export Template Settings
The following settings are available when adding this resource. The fields marked with an asterisk are mandatory.
Note
Import/Export package is meant to be independent. This means, that the following settings can be different if no configuration items will be imported or exported.
Edit Common Information

Edit Common Information Screen
- Name *
- The name of this resource. Any type of characters can be entered to this field including uppercase letters and spaces. The name will be displayed in the overview table.
- Object *
- Select the object type you want to import to or export from.
- Format *
- Select the import and export format.
- Validity *
- Set the validity of this resource. Each resource can be used in OTRS only, if this field is set to valid. Setting this field to invalid or invalid-temporarily will disable the use of the resource.
- Comment
- Add additional information to this resource. It is recommended to always fill this field as a description of the resource with a full sentence for better clarity.
Edit Object Information
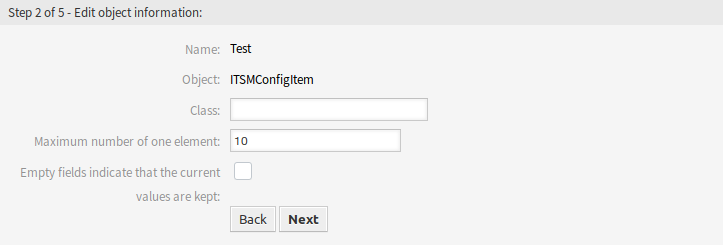
Edit Object Information Screen
- Name
- This is a read only field from the previous step. Use the Back button to edit it.
- Object
- This is a read only field from the previous step. Use the Back button to edit it.
- Class *
- Select the class that is needed to be affected by the import and export.
- Maximum number of one element *
- Specify the maximum number of columns per array attribute that can be mapped when mapping the import from or export to the CSV file.
- Empty fields indicate that the current values are kept
- Select this checkbox if the empty field should keep the data in OTRS. Otherwise the data will be overwritten with blank value.
Edit Format Information
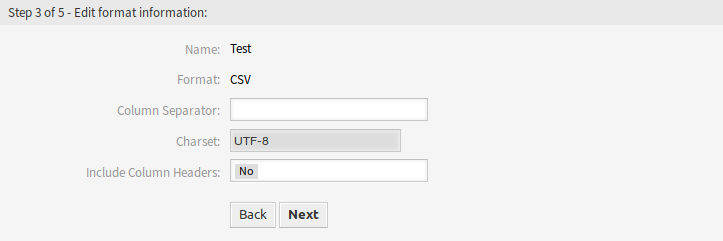
Edit Format Information Screen
- Name
- This is a read only field from the previous step. Use the Back button to edit it.
- Format
- This is a read only field from the previous step. Use the Back button to edit it.
- Column Separator *
- Select a column separator for CSV file.
- Charset
- Select a character encoding for the CSV file.
- Include Column Headers
- Specify if column headers should be included or not.
Edit Mapping Information

Edit Mapping Information Screen
Click on the Add Mapping Element button to add element from the class. You can also specify if this element is an identifier. The order of the elements is sortable.
Edit Search Information
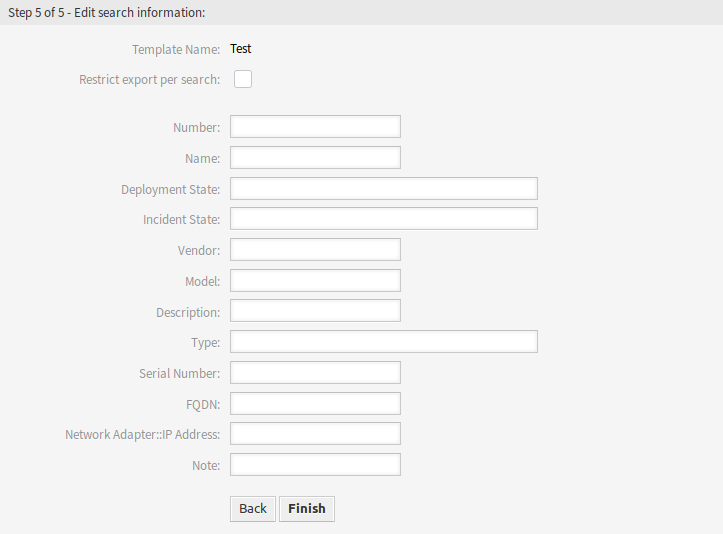
Edit Search Information Screen
- Template Name
- This is a read only field from the previous step. Use the Back button to edit it.
- Restrict export per search
- You can add search term for each attribute of the selected class to restrict the import and export functions. The possible fields are listed below this field.
Note
The other fields come from the back end driver, and can be different depending on the used object to be imported or exported.