Customers ↔ Groups
Your organization grows, and it’s not practical at some point to assign permissions to individual users, you need to assign the permissions to all customer users of a customer.
OTRS allows you to assign group permissions to a customer. Access works just the same as for agents, preventing a customer from modifying and viewing a request. Thus allowing the customer to focus on the results of the original communication and funneling the discussion through one ticket.
See also
Assign a single customer user to a group using Customer Users ↔ Groups.
Use this screen to add one or more customers to one or more groups. To use this function, at least one customer and one group need to have been added to the system. The management screen is available in the Customers ↔ Groups module of the Users, Groups & Roles group.
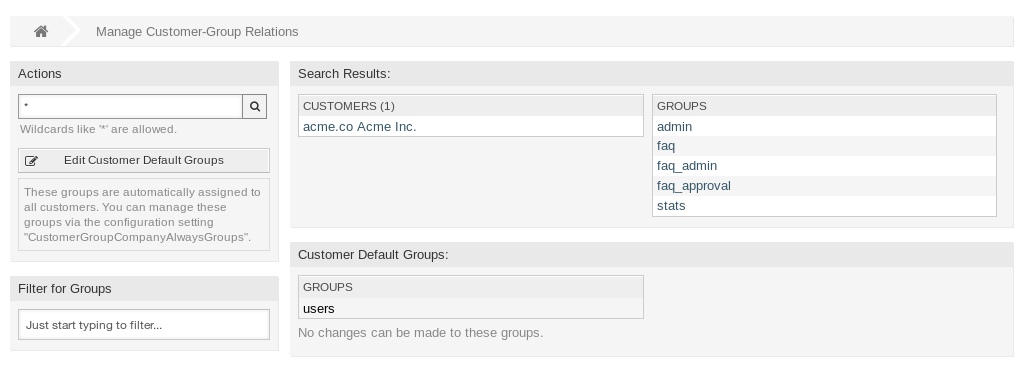
Manage Customer-Group Relations
Customer group support needs to be enabled in at least one customer user back end to use this function. For the default OTRS back end, this can be enabled in the system configuration by clicking on the Enable it here! button.
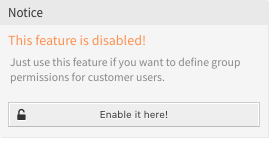
Enable Customer Group Feature
Note
To enable this feature in systems using a directory server or multiple non-default back ends, a custom configuration file needs to be placed in Kernel/Config/Files (for example named ZZZ_CustomerBackend.pm). Once activated, all customer users from this back end will require group assignment.
Warning
After making changes to the back end, the server cache will be deleted, which may cause a temporary drop in performance.
Manage Customers ↔ Groups Relations
Note
To be able to use this feature, you have to activate the CustomerGroupSupport setting.
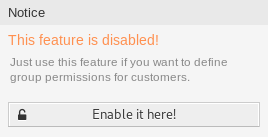
Enable Customer-Group Support
To assign some groups to a customer:
- Click on a customer in the Customers column.
- Select the permissions you would like to connect the customer to groups with.
- Click on the Save or Save and finish button.
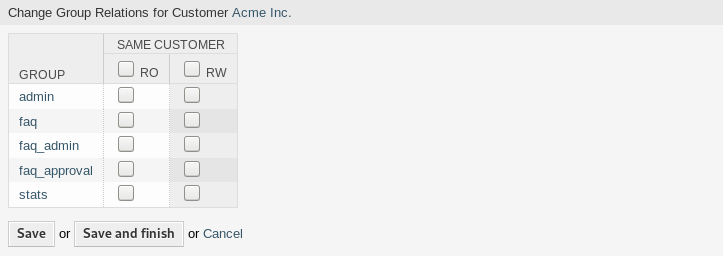
Change Group Relations for Customer
To assign some customers to a group:
- Click on a group in the Groups column.
- Select the permissions you would like to connect the group to customers with.
- Click on the Save or Save and finish button.

Change Customer Relations for Group
To change customer default groups:
- Click on the Edit Customer Default Groups button in the left sidebar.
- Add or modify groups in setting CustomerGroupCompanyAlwaysGroups.
- Deploy the modified system configurations.

CustomerGroupCompanyAlwaysGroups System Configuration Screen
These groups are automatically assigned to all customers.
Note
If several customers or groups are added to the system, use the search box to find a particular customer or use the filter box to find a particular group by just typing the name to filter.
Multiple customers or groups can be assigned in both screens at the same time. Additionally clicking on a customer or clicking on a group in the relations will open the Edit Customer screen or the Edit Group screen accordingly.
Warning
Accessing a customer or a group provides no back link to the relations screen.
Customers ↔ Groups Relations Reference
When assigning a customer to a group or vice versa, several permissions can be set as connection between a customer and a group. Group permissions will be inherited by all customer users of the customer. Different contexts of permission assignment are available, which will determine how the permissions are inherited by customer users.
The following contexts are available:
- Same Customer
Gives customer users group based access to tickets from customer users of the same customer (ticket
CustomerIDis aCustomerIDof the customer user).Note
This feature is enabled by default. You can disable it via the
CustomerGroupPermissionContext###001-CustomerID-samesetting.- Other Customers
Provides customer users access to tickets even if the tickets are not assigned to a customer user of the same customer ID(s), based on permission groups.
Note
To be able to use this feature, you have to activate the
CustomerGroupPermissionContext###100-CustomerID-othersetting.
The following permissions are available by default:
- ro
- Read only access to the resource.
- rw
- Full read and write access to the resource.
See also
Not all available permissions are shown by default. See System::Customer::Permission setting for permissions that can be added. This additional permission can be added:
- create
- Permission to create a ticket.
Note
By setting a checkbox in the header of a column will set all the checkboxes in the selected column. By setting the checkbox in the last rw column will set all the checkboxes in the selected row.
Permission Functionality Example
Access to tickets on the external interface with enabled group support is mostly evaluated by a combination of group and individual (customer/customer user based) permission. Only if both criteria are met, specific access is granted.
If the resulting access is rw, a customer user can view and modify a ticket. If the access is ro only viewing is possible.
For ticket creation only the group permissions are used and a customer user can create tickets for all queues with rw permissions.
Group permissions are additive (meaning that only one method needs to grant permissions) and the following possibilities are taken into account:
- Customer user default groups via system configuration setting.
- Groups assigned to the customer user via the Customer Users ↔ Groups screen.
- Customer default groups via system configuration setting.
- Groups assigned to the customer via the Customers ↔ Groups screen.
For the methods above, all customers related to a customer user are used. This includes the primary customer (selected in the Customer Users screen), additional customers (added in Customer Users ↔ Customers screen) and other customer that might exist in the back end.
Individual permission checks require one of the following conditions to be met:
- Ticket is assigned to the customer user.
- Ticket is assigned to a customer that the customer user is related to (as explained above).
- Ticket is assigned to a customer with group permissions for the ticket queue while a customer related to the customer user has Other Customers permission to the same group.
An example for the last item to clarify the functionality:
- Ticket is assigned to customer user Arvid Karlsson with related customer Ericsson AB.
- Ticket is located in queue Support Sweden.
- Queue Support Sweden is in group support-se.
- Customer Ericsson AB has Same Customer context with rw permission to group support-se.
- Logged in customer user is Barry Smith which is related to customer Farmers Inc..
- Customer Farmers Inc. has Same Customer context with ro permission to group support-se.
- Now, if customer Farmers Inc. is given Other Customers context with ro permission to group support-se, Barry Smith will be able to view the ticket.
- In order for Barry to modify the ticket, rw permission is required for both Same Customer and Other Customers contexts.
Multi-tier Customer Relationship
In this example we will create a multi-tier customer structure with resulting ticket permissions. To get the same results you will need a relatively clean system without many customizations.
Create the following customers in the Customers screen:
Customer ID Customer deGraubrot AG mxHernandez SA seEricsson AB usFarmers Inc. Create the following customer users in the Customer Users screen and assign them to the already created customers. Use any valid email address for the email field.
Firstname Lastname Username Customer ID Arvid Karlsson akEricsson AB Barry Smith bsFarmers Inc. Christian Müller cmGraubrot AG Diego Garcia dgHernandez SA Create the following groups in the Groups screen:
faq-amerfaq-emeasupport-desupport-mxsupport-sesupport-us
Go to the Queues screen and add corresponding queues which will use the previously created groups. In the System address field you can use any available address.
Name Group FAQ Germany faq-emeaFAQ Mexico faq-amerFAQ Sweden faq-emeaFAQ USA faq-amerSupport Germany support-deSupport Mexico support-mxSupport Sweden support-seSupport USA support-usGo to the Customer Users ↔ Customers screen and assign the select customer users to other customers.
Customer User Customers Active Arvid Karlsson deGraubrot AGyes {1} Diego Garcia seEricsson ABusFarmers Inc.yes {2} Go to the Customer Users ↔ Groups screen and assign a single customer user direct access to a group.
Customer User Group Permission Diego Garcia faq-emearw {3} Go to the Customers ↔ Groups screen and assign customers to groups according to the matrix below. Be sure to select proper permission level for each group and company.
Customer Same Customer Other Customers deGraubrot AGfaq-amer→ ro {4}faq-emea→ rosupport-de→ rwsupport-mx→ romxHernandex SAfaq-amer→ ro {5}faq-emea→ rosupport-de→ rosupport-mx→ rwsupport-de→ rw {6}support-mx→ rwseEricsson ABfaq-amer→ ro {7}faq-emea→ rosupport-se→ rwusFarmers Inc.faq-amer→ ro {8}faq-emea→ rosupport-us→ rwfaq-amer→ ro {9}
The {6} is intentional to demonstrate limitation to base permissions.
For reference, please consult the image below where all relationships are drawn as lines:
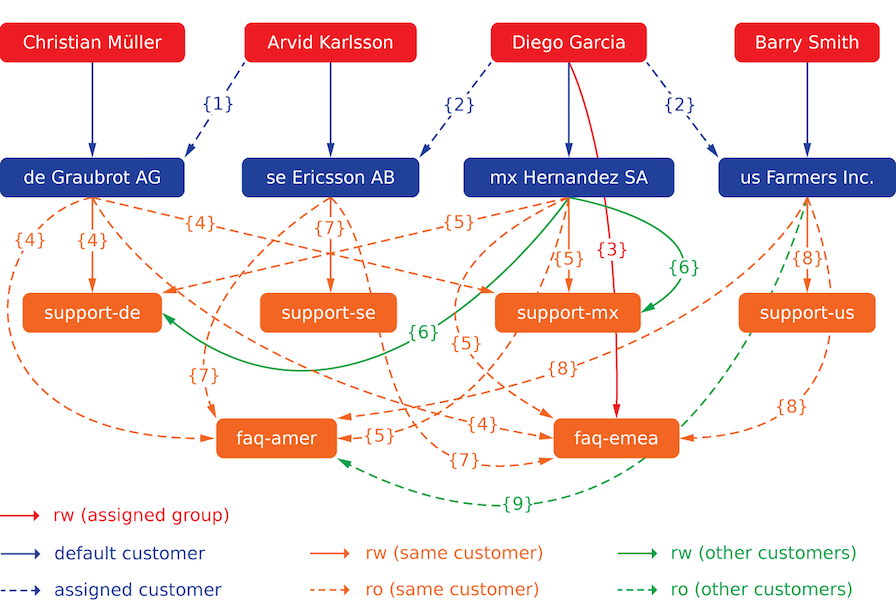
Multi-tier Customer Relationship
- Create some tickets. Go to New Phone Ticket screen and create tickets, one each per customer user and queue (32 in total). By the way, this is possible in the agent interface as the customer group restrictions are only active on the external interface.
For checking resulting access to the tickets, you can easily switch between the customer users by activating SwitchToCustomer option in the system configuration. Then just go to the Customer Users and click on corresponding Switch to customer link next to the customer user’s name.
You will be immediately logged in as that customer user and you can visit the Company Tickets screen using the Ticket menu item for checking the ticket access. It should conform to the matrix below. Click on a ticket to check if corresponding permission level is honored: for ro permission level you should not see the Reply button.
This is the expected result for each customer user. The marker {N} refers to the location above where the corresponding setting was taken (this shows why the access is granted).
Resulting access for customer user Arvid Karlsson:
- Queue FAQ Germany: ro (via {7}) + Christian’s tickets ro (via {1})
- Queue FAQ Mexico: ro (via {7}) + Christian’s tickets ro (via {1})
- Queue FAQ Sweden: ro (via {7}) + Christian’s tickets ro (via {1})
- Queue FAQ USA: ro (via {7}) + Christian’s tickets ro (via {1})
- Queue Support Germany: rw (via {1 → 6}) + Christian’s tickets rw (via {1})
- Queue Support Mexico: -
- Queue Support Sweden: rw (via {7}) + Christian’s tickets rw (via {1})
- Queue Support USA: -
Resulting access for customer user Barry Smith:
- Queue FAQ Germany: ro (via {8})
- Queue FAQ Mexico: ro (via {8}) + Arvid’s, Christian’s, Diego’s tickets ro (via {9})
- Queue FAQ Sweden: ro (via {8})
- Queue FAQ USA: ro (via {8}) + Arvid’s, Christian’s, Diego’s tickets ro (via {9})
- Queue Support Germany: -
- Queue Support Mexico: -
- Queue Support Sweden: -
- Queue Support USA: rw (via {8})
Resulting access for customer user Christian Müller:
- Queue FAQ Germany: ro (via {4})
- Queue FAQ Mexico: ro (via {4})
- Queue FAQ Sweden: ro (via {4})
- Queue FAQ USA: ro (via {4})
- Queue Support Germany: rw (via {4})
- Queue Support Mexico: ro (via {4})
- Queue Support Sweden: -
- Queue Support USA: -
Resulting access for customer user Diego Garcia:
- Queue FAQ Germany: rw (via {3}) + Arvid’s, Barry’s tickets rw (via {2})
- Queue FAQ Mexico: ro (via {5}) + Arvid’s, Barry’s tickets ro (via {2}) + Christian’s tickets ro (via {2 → 9})
- Queue FAQ Sweden: rw (via {3}) + Arvid’s, Barry’s tickets rw (via {2})
- Queue FAQ USA: ro (via {5}) + Arvid’s, Barry’s tickets ro (via {2}) + Christian’s tickets ro (via {2 → 9})
- Queue Support Germany: ro (via {5}) + Arvid’s, Barry’s tickets ro (via {2}) + Christian’s tickets ro (via {6})
- Queue Support Mexico: rw (via {5}) + Arvid’s, Barry’s tickets rw (via {2}) + Christian’s tickets rw (via {6})
- Queue Support Sweden: rw (via {2 → 4}) + Arvid’s, Barry’s tickets rw (via {2})
- Queue Support USA: rw (via {2 → 5}) + Arvid’s, Barry’s tickets rw (via {2})