Dashboard
Every agent can choose the customers he wants to see via configuration options of this dashboard widget. For the selected customers the number of open/unlocked, open/locked and escalated tickets will be shown.
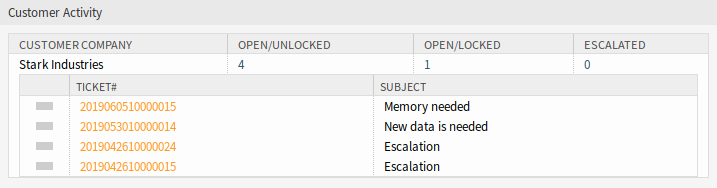
Customer Activity Widget
By clicking on the number of tickets a list of tickets will be shown. Click on a ticket to open the it in the Ticket Zoom screen.
To turn on and off the widget:
- Expand the Settings widget in the right sidebar by clicking on its header bar.
- Modify the checked state of the Customer Activity entry.
- Click on the Save settings button.
To add customers to the widget:
- Hover the mouse over the widget header.
- Click on the gear icon in the top right corner.
- Enter the customer ID of a customer into the text field.
- Click on the Save Changes button.

Customer Activity Widget - Add Customer
After entering and submitting a customer, an additional customer can be entered in the empty company field after re-opening the settings. So customers can be added one after another.
To remove a customer from the widget:
- Hover the mouse over the widget header.
- Click on the gear icon in the top right corner.
- Click on the minus icon next to the text field.
- Click on the Save Changes button.