Agent Interface
This package extends the ticket create screens and the Ticket Zoom screen to set and change the master/slave status.
To create a master ticket:
- Open the New Phone Ticket screen.
- Fill in the required fields.
- Select New Master Ticket in the Master Ticket field.
- Click on the Create button.
- Click on the ticket number of the newly created ticket to open its Ticket Zoom screen.
- Check the Master Ticket status in the Ticket Information widget.
To create a slave ticket:
- Open the New Phone Ticket screen.
- Fill in the required fields.
- Select New Master Ticket in the Master Ticket field.
- Select Slave of Ticket#XXXXX: <Ticket Title> in the Master Ticket field.
- Click on the Create button.
- Click on the ticket number of the newly created ticket to open its Ticket Zoom screen.
- Check the Master Ticket status in the Ticket Information widget.
To make slave ticket to follow its master updates:
- Go to the Ticket Zoom screen of the master ticket.
- Click on the Priority menu item in the ticket menu and change the priority to 1 very low and add an article to the master ticket.
- Go to the Ticket Zoom screen of the slave ticket.
- The priority of the slave ticket has been also changed to 1 very low and the same article has been added to this ticket as the master ticket has.
For this example the priority of the master ticket has been changed, but there are other activities that can be done instead to test this behavior, like change the state, the owner, the responsible, the lock status, reply the ticket, add a note or close the ticket.
When a new article is created on the master ticket, the slave tickets replicates the article using the customer user from the master and not the own from the slave.
Enabled article types defined in the ReplaceCustomerRealNameOnSlaveArticleTypes system configuration setting will retain the customer user that is set in the slave tickets for master ticket replicated articles.
The master/slave relations are based on the ParentChild link type.
Master / Slave Window
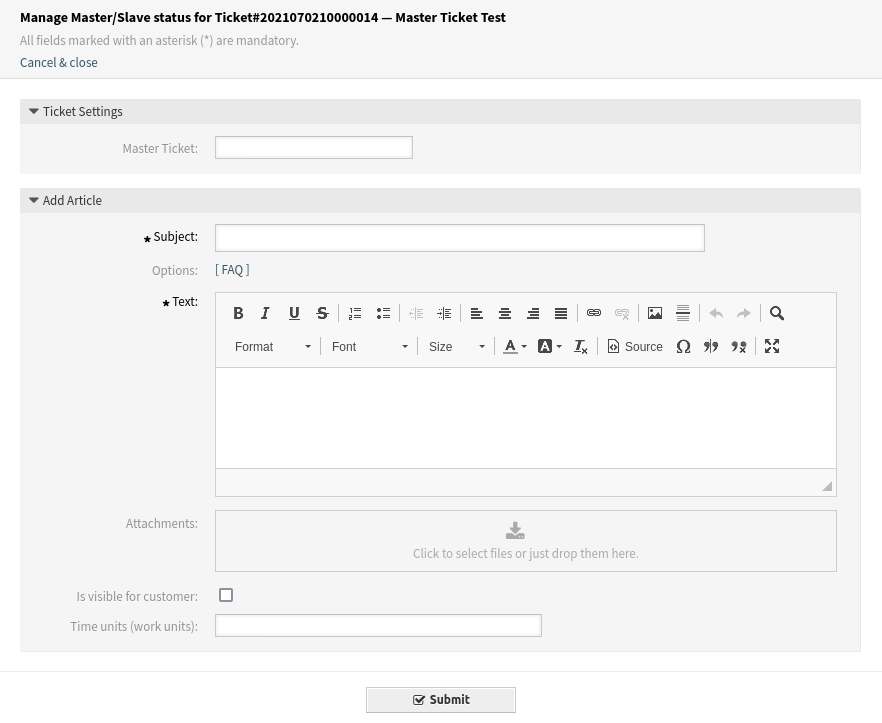
A new Master Slave menu item is added to the ticket menu of the Ticket Zoom screen.
Note
While this window is available also in basic mode, the Master Ticket field is not available. It is only in advanced mode where this window will let the change of the master/slave status.

Master / Slave Window
If advanced mode is enabled, the bulk action screen enables the Master Ticket field to allow the change of the master/slave status.
To change the master/slave status:
Make sure that the following system configuration settings are enabled:
MasterSlave::AdvancedEnabled
MasterSlave::UnsetMasterSlave
MasterSlave::UpdateMasterSlave
MasterSlave::FollowUpdatedMaster
The most important setting is the
MasterSlave::AdvancedEnabled. If it is not enabled then the Master Ticket field will not appear in the Ticket Settings widget.Go to the Ticket Zoom screen of the slave ticket.
Click on the Master Slave menu item in the ticket menu.
Change the Master Ticket field. Depending on the current master/slave status of the tickets, the enabled settings and the status of other tickets, the following options are available:
- New Master Ticket
This option makes a master ticket from the ticket.
- Unset Master Ticket
This option removes the master status and the ticket will be a normal ticket. This option is available only to master tickets.
- Unset Slave Ticket
This option removes the slave status and the ticket will be a normal ticket. This option is available only to slave tickets.
- Slave of Ticket#XXXXX: <Ticket Title>
This option makes the ticket as the slave of the selected master ticket. This option is available only if there are other master tickets and will be displayed for each master ticket.
Fill in the required fields.
Click on the Submit button.
Dashboard Widgets
This package adds two ticket list widgets to the dashboard. One ticket list widget lists the master tickets and the other is for slave tickets.
Using the new ticket list widgets is the same as the usage of other ticket list widgets on the dashboard.